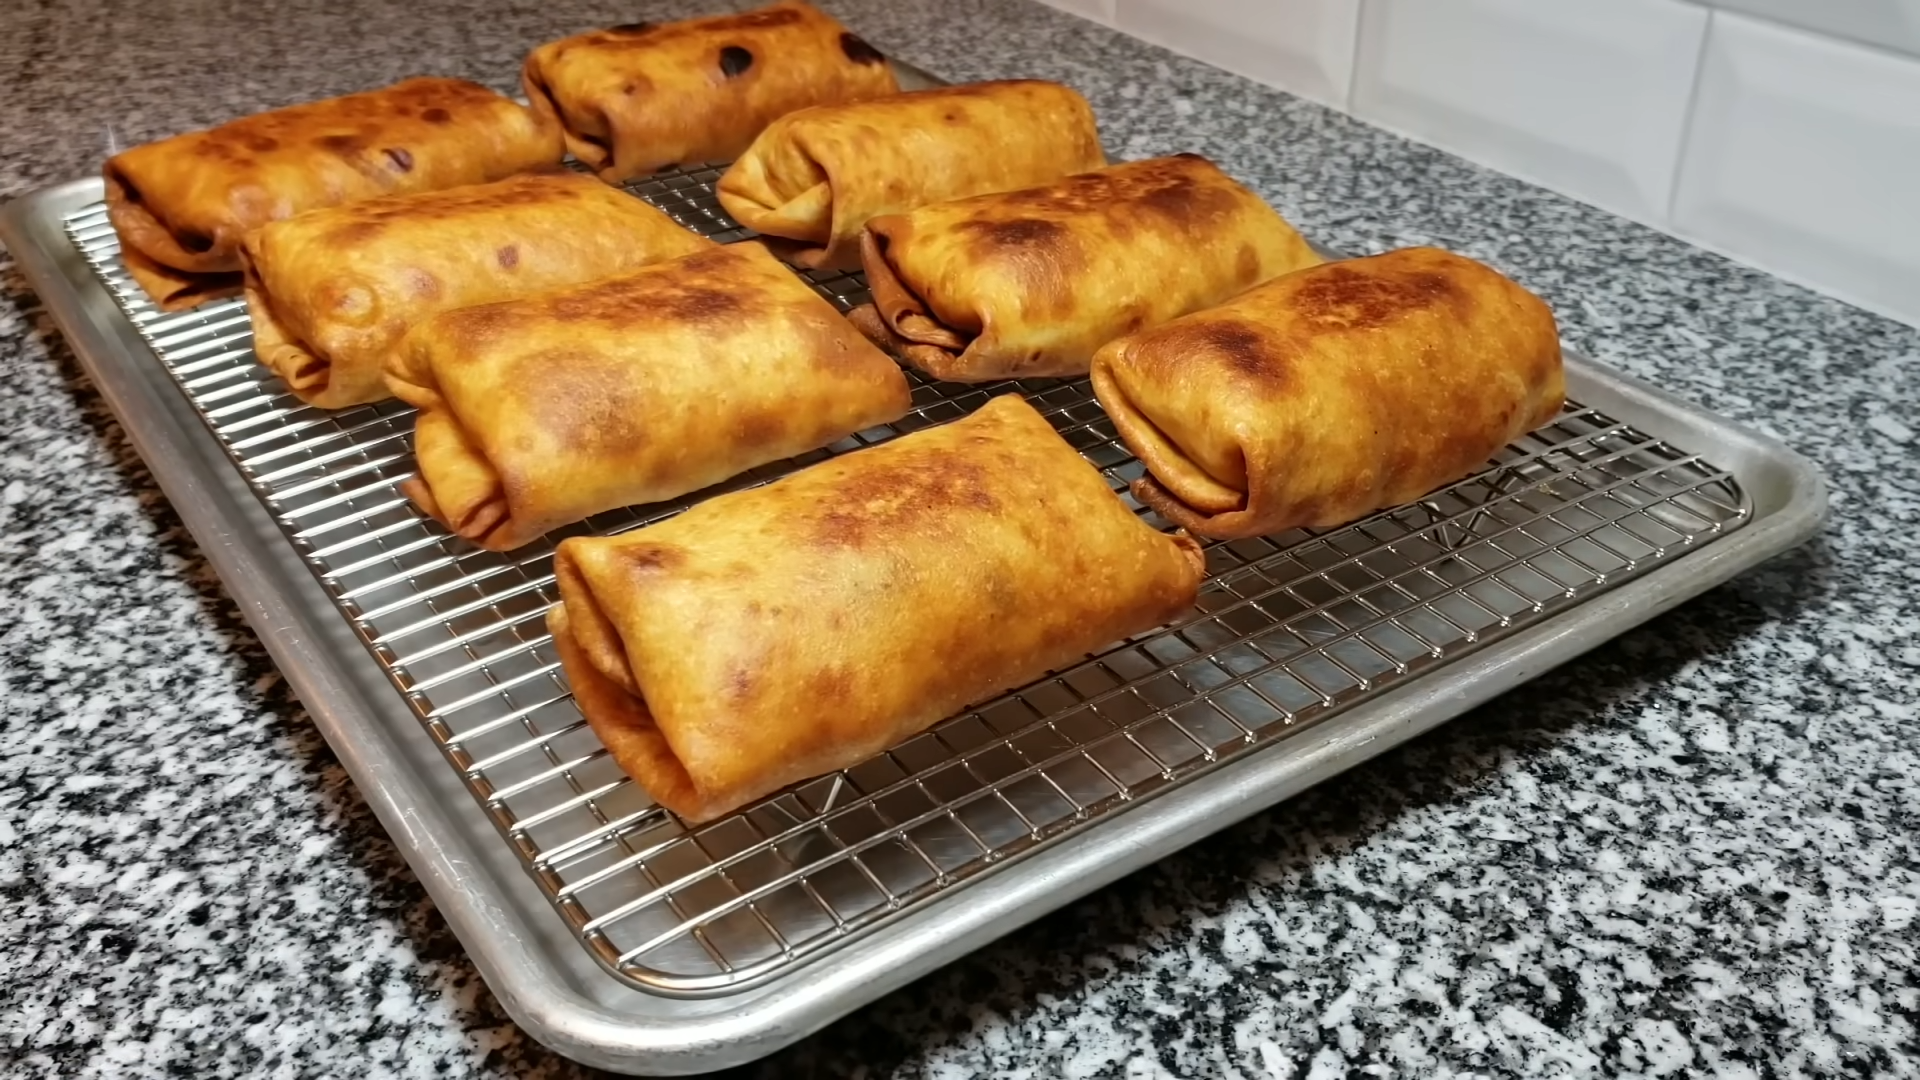
If you’re looking for a crispy, cheesy, and savory meal, Cheesy Chicken Chimichangas are the perfect solution. This Tex-Mex favorite combines the crunch of fried or baked tortillas with a deliciously seasoned shredded chicken and gooey melted cheese filling. Whether you’re craving something comforting for dinner or planning a fun family meal, chimichangas are an irresistible choice that can be customized to suit anyone’s taste.
What makes Cheesy Chicken Chimichangas stand out is their combination of texture and flavor. A crispy outer tortilla encases a warm, cheesy filling that can be as spicy or mild as you like. While chimichangas are traditionally fried, there are also healthier options like baking or air-frying that still provide that satisfying crunch. To learn more about the pros and cons of frying versus baking, check out this resource on baking vs. frying.
What Are Cheesy Chicken Chimichangas?
A chimichanga is essentially a deep-fried burrito, a dish that has become a staple in Mexican-American cuisine. Chimichangas are typically filled with ingredients like shredded chicken, cheese, and beans, all wrapped in a large flour tortilla. Once wrapped, they are either fried or baked until crispy.
The origin of the chimichanga is debated, with some stories claiming it was invented accidentally when a burrito was dropped into hot oil, while others say it’s a modern twist on classic Mexican dishes. Regardless of its origins, the chimichanga has become popular for its crispy texture and the endless filling possibilities. By adding plenty of cheese and tender chicken, you can create a dish that’s both hearty and indulgent.
To take this dish to the next level, it’s important to choose the right cheese. A good blend of cheddar, Monterey Jack, or even pepper jack adds creaminess and flavor. For tips on choosing the best cheese, you can explore more about Mexican cheese options here.
Ingredients for Cheesy Chicken Chimichangas
Here’s a breakdown of the essential ingredients you’ll need to make perfect Cheesy Chicken Chimichangas:
For the Chimichangas:
- 2 cups shredded cooked chicken (rotisserie chicken works well)
- 1 ½ cups shredded cheese (cheddar, Monterey Jack, or a spicy pepper jack)
- 4 large flour tortillas
- 1 cup black beans (optional, for added texture and protein)
- 1 small onion, finely chopped
- 1 bell pepper, chopped
- 1 tablespoon taco seasoning (or a mix of cumin, chili powder, and garlic powder)
- 1 tablespoon vegetable oil (for frying or brushing if baking)
Optional Add-ins:
- Green chiles for extra heat
- Cooked rice to make the meal more filling
- Sour cream, guacamole, and pico de gallo for serving
Step-by-Step Guide to Making Cheesy Chicken Chimichangas
1. Prepare the Chicken Filling
- Start by heating some oil in a large skillet over medium heat. Add the onion and bell pepper, cooking until softened (about 5 minutes).
- Stir in the shredded chicken, black beans (if using), and taco seasoning. Cook for a few more minutes until everything is well combined and the chicken is heated through.
- Remove the pan from the heat and stir in the shredded cheese. The heat from the filling will melt the cheese, making it deliciously gooey.
2. Assemble the Chimichangas
- Lay out your flour tortillas on a flat surface. Spoon a generous amount of the chicken and cheese filling into the center of each tortilla.
- Fold the sides of the tortilla inward, then roll it up from the bottom, ensuring the filling is tightly packed and won’t spill out during cooking. Secure with toothpicks if necessary.
3. Fry, Bake, or Air-Fry
- Frying: Heat about 1 inch of oil in a deep skillet over medium heat. Fry the chimichangas for about 2-3 minutes per side until golden brown and crispy.
- Baking: Preheat your oven to 375°F (190°C). Brush the chimichangas with oil and bake for 20-25 minutes, flipping halfway through, until crispy and golden.
- Air-Frying: Preheat your air fryer to 375°F. Lightly brush the chimichangas with oil and cook for 10-12 minutes, turning halfway through for even crisping.
Tips for Perfect Cheesy Chicken Chimichangas
1. Seal the Chimichangas Tightly
- To avoid spilling during frying or baking, make sure your chimichangas are tightly sealed. You can use toothpicks to secure them, especially if frying.
2. Don’t Overfill the Tortillas
- While it’s tempting to pack in as much filling as possible, overfilling can lead to bursting tortillas. Stick to moderate amounts to ensure even cooking and crispiness.
3. Use High-Quality Cheese
- For a creamy and delicious filling, use high-quality cheese that melts well. If you’re looking for a bit of spice, try pepper jack or add a few dashes of hot sauce to the filling.
Cheesy Variations and Customizations
The beauty of Cheesy Chicken Chimichangas lies in their versatility. Here are some variations to consider:
1. Cheese Options
- Try using pepper jack for a spicy kick, mozzarella for a stretchier texture, or even cream cheese for an extra creamy filling.
2. Spice It Up
- Add jalapeños, chipotle peppers, or salsa verde to the filling for extra heat and a smoky flavor. If you like your chimichangas spicy, marinate the chicken in hot sauce before assembling.
3. Vegetarian and Healthier Alternatives
- Swap out the chicken for black beans, zucchini, or mushrooms to create a vegetarian version. For a healthier option, use whole wheat tortillas and reduced-fat cheese.
Serving Suggestions for Cheesy Chicken Chimichangas
Pair your chimichangas with these tasty sides and toppings for a complete Tex-Mex meal:
- Mexican Rice: A classic side that adds extra heartiness to the meal.
- Guacamole: The cool, creamy texture of guacamole is the perfect contrast to the crispy chimichangas. Try this easy guacamole recipe for a fresh homemade option.
- Pico de Gallo: A fresh and tangy salsa made with diced tomatoes, onions, and cilantro that pairs well with the rich, cheesy filling.
- Sour Cream and Salsa: These add a cool and tangy finish to balance the richness of the dish.
FAQs About Cheesy Chicken Chimichangas
1. Are chimichangas always fried?
- Traditionally, chimichangas are fried to achieve that crispy texture. However, baking and air-frying are great alternatives if you’re looking for a healthier option with less oil.
2. What’s the difference between chimichangas and burritos?
- While both are wrapped in a tortilla, the main difference is that chimichangas are fried or baked until crispy, whereas burritos are served soft.
3. Can I make chimichangas ahead of time?
- Yes! You can assemble the chimichangas and store them in the fridge or freezer before cooking. When you’re ready to eat, fry, bake, or air-fry them for a quick, crispy meal.
4. How do I reheat chimichangas without losing the crispiness?
- The best way to reheat chimichangas is in the oven or air fryer at 350°F. This will help retain the crispy texture, unlike microwaving, which can make them soggy.
LSI and NLP Keywords for “Cheesy Chicken Chimichangas”
- Tex-Mex chicken chimichanga
- Crispy chicken tortilla wraps
- Mexican fried burrito
- Homemade chimichanga recipe
- Air fryer chicken chimichangas
- Cheese-filled chimichanga
- Baked chicken chimichangas
- Easy Tex-Mex dinner
- Shredded chicken burrito
- Cheesy Tex-Mex chimichanga
- Mexican chicken wraps
- Chimichanga fillings
- Spicy chicken chimichanga recipe
- Chimichangas with cheese
- Vegetarian chimichanga options
Conclusion
Cheesy Chicken Chimichangas are the perfect meal for anyone craving something crunchy, cheesy, and packed with flavor. Whether you choose to fry, bake, or air-fry them, this dish is sure to please with its crispy tortilla exterior and gooey, savory filling. Pair them with guacamole, salsa, and a side of Mexican rice for the ultimate Tex-Mex experience.
With endless customization options, from cheese choices to spicy twists, chimichangas are a versatile dish that will quickly become a family favorite. Now that you have the recipe, it’s time to make your own Cheesy Chicken Chimichangas at home!

